

Treat sesamoiditis by offloading the joint immediately, icing it several times a day, and using NSAIDs if your doctor clears them. Most people notice less pain within a couple of weeks. Full recovery through conservative sesamoiditis treatment generally takes several weeks, though athletes and delayed cases can run longer.
Start today with these three moves:
- Offload the joint: Slip a J-pad or donut cushion under the ball of your foot and switch to a stiff-soled or post-op shoe. Skip any activity that forces you to push off your big toe.
- Ice it down: Apply ice for 15 to 20 minutes, several times daily, especially after you have been on your feet.
- Manage inflammation: If your doctor says it is safe given your health history, a short course of NSAIDs can take the edge off swelling and pain while the joint calms down.
TL;DR:
- Immediate offloading with a J-pad and stiff-soled shoe is crucial to reduce pressure on the sesamoids and promote faster recovery.
- An acute “pop,” rapid bruising, or inability to bear weight signals a possible fracture requiring urgent imaging, not just home treatment.
- Progression through a structured exercise program should be based on pain-free milestones, especially walking for 30 minutes without pain before returning to running.
- Imaging such as weight-bearing X-rays identifies fractures or bipartite variations, while MRI is reserved for persistent pain or soft tissue assessment.
- Long-term prevention involves supportive footwear with stiff forefoot and rocker sole features, orthotics, and gradual training adjustments.
Table of Contents
- What Is Sesamoiditis and Why Does Overload Cause It?
- What Are the Symptoms and Causes of Sesamoiditis?
- When Do You Need X-Rays or an MRI for Sesamoiditis?
- How Do You Treat Sesamoiditis Without Surgery?
- Do Injections and Other In-Office Treatments Work for Sesamoiditis?
- What Exercises Help You Recover From Sesamoiditis?
- When Should You See a Podiatrist for Sesamoid Pain?
- How Do You Prevent Sesamoiditis From Coming Back?
- How Does Stride Foot & Ankle Approach Sesamoiditis Care?
- What Recovery Timeline Should You Realistically Expect?
- What the Evidence Actually Supports and Where Conventional Advice Falls Short
- Get Evaluated for Sesamoiditis in Las Vegas
- Key Takeaways
- Sources
- FAQ
What Is Sesamoiditis and Why Does Overload Cause It?
Sesamoiditis is inflammation of the two small, pea-sized sesamoid bones embedded in the tendon under your big toe joint, the first metatarsophalangeal (MTP) joint. These bones act like a pulley system for the flexor hallucis brevis (FHB) tendon, redirecting force every time you push off the ground while walking, running, or jumping. The flexor hallucis longus (FHL) tendon runs nearby, bending the big toe itself.
Because these bones sit directly under your body weight at exactly the point where push-off force concentrates, they take a disproportionate beating. Think of them as the shock absorbers under the ball of your foot. When you run, dance, or wear heels that tilt your weight forward, you multiply the load on that tiny joint dozens or hundreds of times per session.
Certain foot shapes make this worse. A high arch or a plantarflexed first ray, where the first metatarsal sits lower than the others, drives extra pressure straight into the sesamoids with every step. Sesamoiditis is fundamentally a volume injury: it builds from repetitive, cumulative overload rather than a single traumatic event, similar to how shin splints or stress fractures develop in runners who ramp up mileage too fast.
That distinction matters for how you approach treatment. Inflammation from overuse responds well to offloading, rest, and graded rehab. A true fracture or a symptomatic bipartite sesamoid (a sesamoid bone naturally divided into two segments, present in a meaningful share of the population) can mimic sesamoiditis symptoms but needs a different management path, sometimes including imaging and a longer immobilization period. Your podiatrist’s exam and any imaging ordered will sort out which one you are actually dealing with.
What Are the Symptoms and Causes of Sesamoiditis?
Sesamoiditis announces itself as a focal, aching pain directly under the base of your big toe, right where the ball of your foot meets the ground. The pain typically worsens with push-off, whether that is the toe-off phase of walking, running, or rising onto your toes, and eases somewhat when you are off your feet.
Watch for these common signs:
- Localized swelling under the first MTP joint, sometimes with a tender spot you can pinpoint with a single finger.
- Pain that builds gradually over days or weeks rather than appearing all at once.
- Difficulty walking barefoot on hard floors, since there is no cushioning between the sesamoids and the ground.
- Mild bruising (ecchymosis) if the onset involved a specific traumatic moment, such as landing awkwardly from a jump.
- A dull ache at rest that sharpens noticeably with any toe-bending or push-off motion.
Certain activities and habits load this joint more than others. Running, especially on hard surfaces or with a forefoot-strike pattern, is a leading trigger. Dancers, particularly those who spend time en pointe or performing repeated toe-off movements, see this condition often enough that it is practically an occupational hazard. High heels shift body weight forward onto the sesamoids for hours at a stretch, and training errors, like increasing mileage or intensity too quickly, remove the recovery window your tissue needs between sessions.
When you see a podiatrist, the exam usually includes direct palpation of the sesamoid bones to localize tenderness, plus a hallux dorsiflexion test, where the clinician bends your big toe upward to reproduce the pain under the sesamoids. This maneuver helps distinguish sesamoiditis from other causes of forefoot pain, since it specifically loads the sesamoid complex rather than the joint capsule or surrounding soft tissue.
Clinicians also watch for conditions that get mistaken for sesamoiditis, including turf toe (a sprain of the MTP joint capsule), Morton’s neuroma, and metatarsalgia. Each requires a different treatment for foot pain, which is exactly why a hands-on exam beats guessing from symptoms alone.
When Do You Need X-Rays or an MRI for Sesamoiditis?
A weight-bearing X-ray is the standard first-line imaging test for suspected sesamoiditis, taken with you standing so the sesamoids are loaded the way they are during normal activity. It helps identify fractures and distinguishes a true break from a bipartite sesamoid, a normal anatomical variant where the bone naturally splits into two smooth-edged pieces rather than one jagged, irregular fracture line.
Reading these X-rays takes some expertise, since a bipartite sesamoid can look alarming to an untrained eye but is a lifelong, usually painless, structural quirk many people never know they have until an X-ray incidentally reveals it.
MRI comes into play when the X-ray looks normal but pain persists, or when a clinician suspects an occult (hidden) fracture or a stress reaction that has not yet shown up on plain film. MRI is also useful for evaluating soft tissue involvement around the FHB tendon and for confirming a diagnosis before considering more invasive treatment for foot pain. Ultrasound can supplement this workup, particularly for visualizing tendon integrity and guiding any injections your podiatrist recommends later in the treatment for foot pain.
Certain presentations mean you should not wait for a scheduled appointment. According to Cleveland Clinic’s clinical guidance, an acute “pop” felt at the moment of injury, followed by rapid bruising and an inability to bear weight, points toward a possible fracture rather than simple inflammation. That combination warrants urgent evaluation and imaging rather than a wait-and-see approach, since a displaced fracture treated late heals less predictably than one caught early.
How Do You Treat Sesamoiditis Without Surgery?
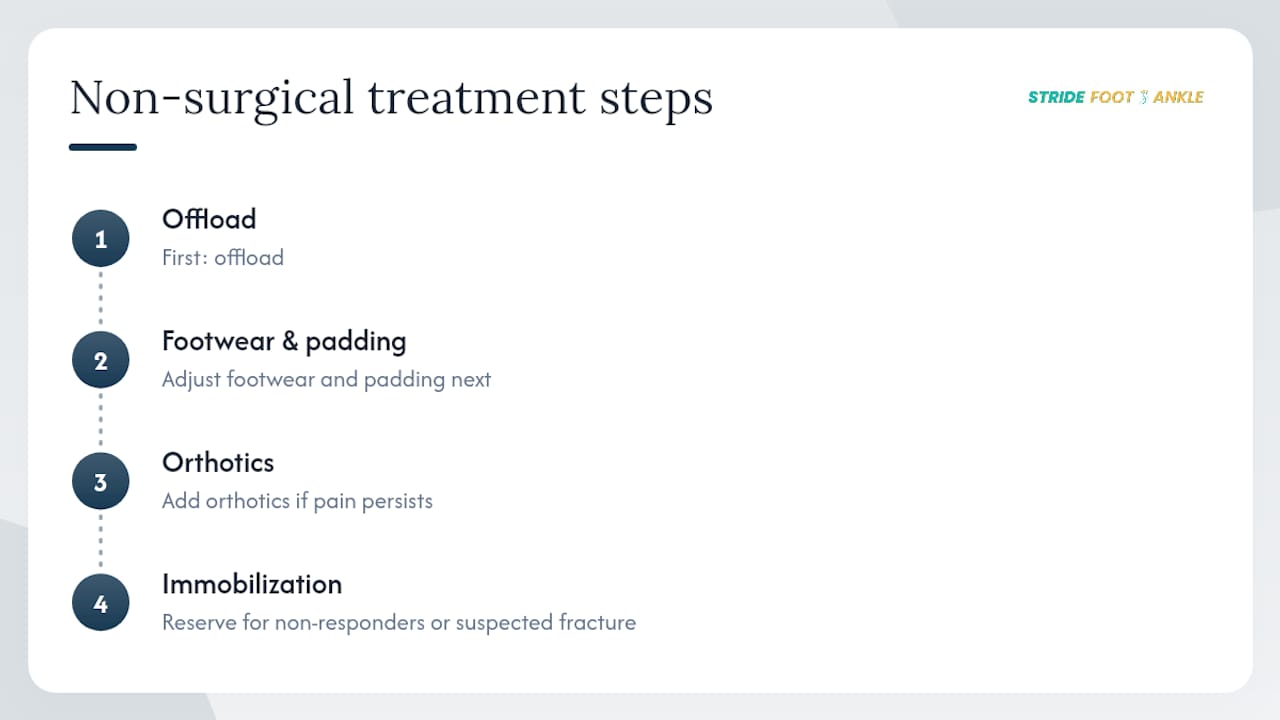
The most reliable non-surgical sesamoiditis options follow a clear sequence: offload first, adjust footwear and padding next, add orthotics if pain persists, and reserve immobilization for cases that do not respond or where fracture is suspected. Most people improve by working through these stages in order rather than jumping straight to the most aggressive option.
Step 1: Immediate Home Care
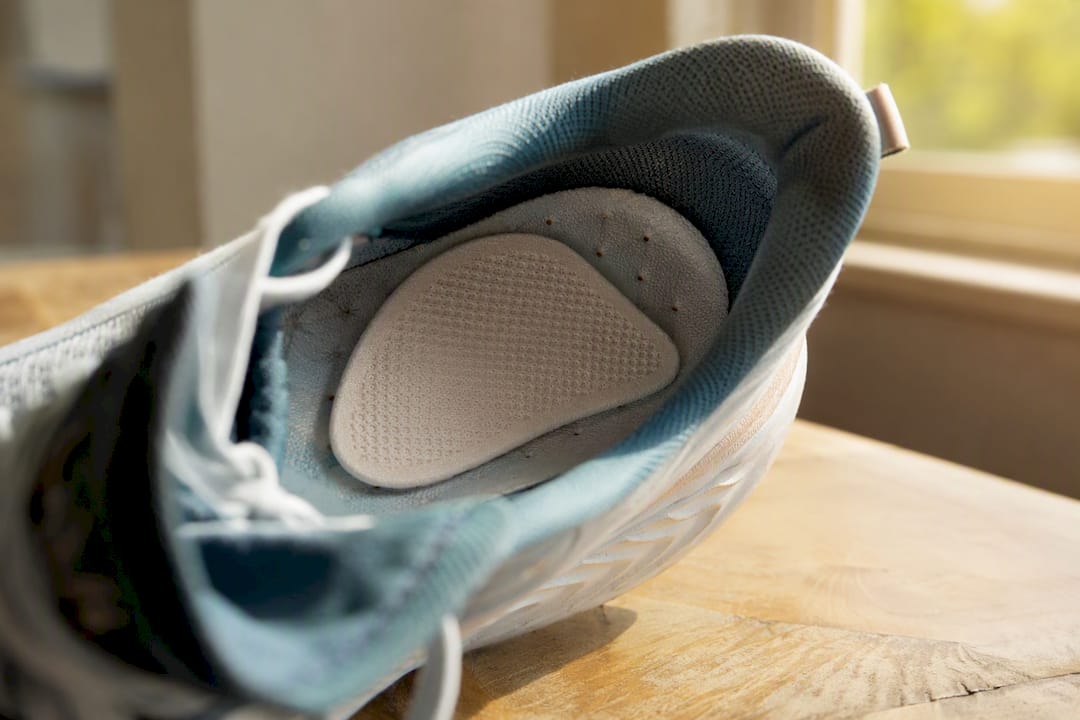
Consistent offloading is the single highest-leverage thing you can do in the first two weeks. A J-pad, a horseshoe-shaped cushion placed just behind the sesamoids, redistributes pressure away from the inflamed area without numbing your proprioception the way a thicker pad might. A donut pad works on the same principle: a cutout beneath the sesamoids removes direct pressure on the sore spot itself.
Pair that with a stiff-soled shoe or a post-op shoe that limits how much your toe joint bends. Avoid walking barefoot on hard floors, tile, or concrete during this window; every barefoot step on a hard surface is a small dose of exactly the loading pattern you are trying to eliminate.
- Place the J-pad or donut cushion under the sesamoids, adjusting position until the tender spot sits inside the cutout rather than on top of the padding.
- Wear a stiff-soled or rocker-bottom shoe for all weight-bearing activity, including short trips around the house.
- Ice for 15 to 20 minutes, three to four times daily, particularly after activity.
- Elevate the foot when resting to help control swelling.
- Avoid any activity involving running, jumping, or repeated toe-off, even if the pain feels manageable in the moment.
Pro Tip: Keep a second J-pad in your bag or car. People often do fine at home with the pad in place, then skip it for a quick errand, and that single unprotected walk can undo several days of progress.
Step 2: Footwear Adjustments
Your shoe choice during recovery matters as much as any single treatment step. Look for a stiff forefoot that resists bending at the ball of the foot, a rocker sole that helps roll you through the gait cycle without requiring the MTP joint to hyperextend, and a low-to-moderate heel-to-toe drop that avoids dumping extra weight forward onto the sesamoids.
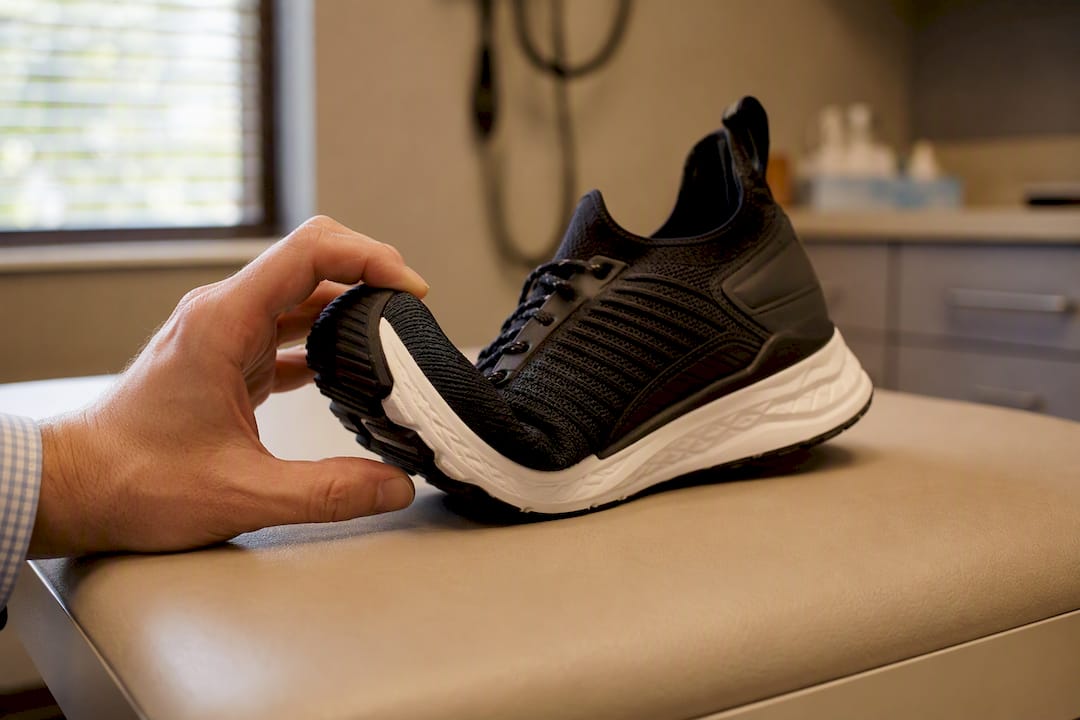
Avoid minimalist shoes with thin, flexible soles, high heels, and anything with a narrow or pointed toe box that compresses the forefoot. Flip-flops and unsupportive sandals are particularly unforgiving, since they offer no structure to resist the bending forces that aggravate the joint.
Step 3: Padding and In-Shoe Devices
Metatarsal pads placed just behind the metatarsal heads (not directly under the sesamoids) can help redistribute pressure across the broader forefoot rather than concentrating it at the injury site. Some patients do well with a combination approach: a J-pad for direct sesamoid offloading plus a metatarsal pad for overall forefoot support.
When home padding and shoe changes are not enough, or when a fracture is suspected, a short-leg fracture boot or a rigid post-op shoe provides more complete immobilization. This step typically follows a period of failed home care, generally two to four weeks without meaningful improvement, or comes earlier if imaging confirms a fracture.
Step 4: Orthotics
Over-the-counter orthotic inserts with built-in metatarsal support work for milder cases and offer a faster, lower-cost starting point. Custom orthotics, molded from a cast or scan of your specific foot, become worthwhile when off-the-shelf options fail to control symptoms or when your foot structure, such as a notably high arch or plantarflexed first ray, needs a more precise correction.
A custom device typically includes a sesamoid cutout, a small relief zone milled directly into the orthotic that mirrors the effect of a J-pad but is built into a shoe insert you can wear across multiple pairs of shoes. Expect a lead time of one to three weeks between the fitting appointment and having the finished device in hand, since custom orthotics are manufactured to order. A systematic review of conservative sesamoiditis treatment found orthotic offloading among the most consistently beneficial interventions across the studies analyzed, particularly for short-term pain and function improvements.
Step 5: When Immobilization Becomes Necessary
If two to four weeks of diligent home care, padding, and footwear changes produce no measurable improvement, or if your podiatrist suspects a fracture based on exam findings or imaging, the next step is typically a period of protected weight-bearing in a fracture boot. This is not a failure of the earlier steps; it simply reflects that some cases need more complete offloading than a pad and stiff shoe can provide. Reviewing conservative foot care options with your podiatrist at this stage helps clarify whether you are on track or need a different approach.
Do Injections and Other In-Office Treatments Work for Sesamoiditis?
Medications and in-office procedures play a supporting role in sesamoiditis treatment, useful for controlling inflammation and buying time for offloading and rehab to do the real healing work, but none of them replace the mechanical fixes above.
Oral or topical NSAIDs remain a first-line option for controlling pain and swelling in the early weeks. They are not without risk, though. People with a history of stomach ulcers, kidney disease, or those taking blood thinners should check with a physician before starting a regular NSAID course, since these medications can affect gastrointestinal, kidney, and clotting function.
When pain does not respond adequately to home measures, some podiatrists recommend an ultrasound-guided corticosteroid injection directly into the area around the sesamoid.
- Ultrasound guidance improves accuracy compared to a landmark-based injection, placing the medication precisely where inflammation is concentrated.
- Relief is often significant in the short term, though the systematic review of conservative sesamoiditis treatment notes that case series reporting these injections describe variable durability, and repeated injections carry a real risk of weakening the surrounding tendon tissue over time.
- Most clinicians cap the number of injections given within a defined period specifically because of that tendon risk.
Shockwave therapy, which delivers focused acoustic pulses to stimulate tissue healing, and low-level laser therapy are additional options some clinics offer for cases that plateau on standard conservative sesamoiditis treatment. Evidence for these modalities is still developing, and they tend to suit patients who have already tried offloading and orthotics without full resolution rather than serving as a first step.
Platelet-rich plasma (PRP) and concentrated bone marrow aspirate (CBMA) injections represent an emerging category, drawing on the patient’s own blood or bone marrow components to support tissue repair. The evidence here comes mainly from case series rather than large randomized trials, so a clinician might recommend PRP or CBMA in specific situations, such as a patient who wants to avoid steroid-related tendon risk, but it is not yet a routine, universally recommended step in sesamoiditis physical therapy plans.
What Exercises Help You Recover From Sesamoiditis?
A phased, criteria-based rehab program moves you from complete offloading to full activity in roughly four stages, each with specific exercises and a clear benchmark you need to hit before advancing. Rushing this sequence is the single most common reason sesamoiditis recurs.
Phase 1: Acute (Weeks 1 to 2). Focus entirely on offloading and cross-training that does not load the forefoot, such as swimming or a stationary bike with the ball of the foot removed from direct pressure. No specific exercises yet; this phase is about calming inflammation down.
Phase 2: Early Rehab (Weeks 3 to 4). Once resting pain has mostly resolved, begin gentle, pain-free range of motion and intrinsic muscle activation.
- Towel scrunches: Sit with a towel flat under your foot and scrunch it toward you using only your toes. Do 2 to 3 sets of 15 repetitions daily.
- Marble pickups: Pick up small marbles or similar objects with your toes and drop them into a bowl. Aim for 20 repetitions per session.
- Intrinsic doming: Press the ball of your foot and heel into the floor while shortening the arch, without curling your toes. Hold for 5 seconds, repeat 10 times.
Phase 3: Strengthening (Weeks 6 to 10). Add progressive resistance once the exercises above feel effortless and pain-free.
- Theraband toe plantarflexion: Loop a resistance band around your toes and push down against it, 3 sets of 12 repetitions.
- Seated calf raises: Build calf and lower-leg strength without full weight-bearing forefoot load, progressing to standing calf raises as tolerated.
- Single-leg balance progressions: Start on a stable surface, then progress to a foam pad, building the stability that protects the joint during uneven terrain.
Phase 4: Return-to-Sport (Weeks 10 to 16). This phase is criteria-based, not calendar-based. A dependable clinic benchmark: do not begin running again until you can walk 30 minutes on a hard surface completely pain-free. That milestone is a strong predictor of lower recurrence risk.
Throughout every phase, stop any exercise or activity that produces pain above 3 out of 10. Pushing through higher pain levels tends to prolong sesamoid injury rehabilitation rather than speed it up. Cross-training with swimming, cycling, or upper-body work keeps your fitness intact without setting back your foot. For a full breakdown of exercises supporting each stage, Stridefootankle’s physical therapy guidance walks through progression details in more depth. Athletes returning to cutting or jumping sports should also review movement-science lessons from other lower-body injuries, which underscore how gradual loading protects against re-injury across sports.
Pro Tip: Track your pain-free walking minutes in a simple notes app. Seeing “22 minutes, no pain” tick up toward that 30-minute benchmark gives you an objective signal instead of guessing whether you feel “ready enough” to run.
When Should You See a Podiatrist for Sesamoid Pain?
Certain signs mean you should skip the home-care trial entirely and get evaluated right away, while others simply mean it is time to check in if things have not improved on your own.
Seek immediate care if you experience:
- An acute “pop” felt at the moment of injury, followed by rapid bruising, which points toward a possible fracture.
- Inability to bear weight on the affected foot at all.
- Pain that is rapidly worsening rather than plateauing or improving, even with rest.
Schedule a podiatry evaluation, without the same urgency but without indefinite delay, if:
- You have followed consistent offloading, padding, and shoe changes for two full weeks with no measurable improvement.
- Symptoms recur after a prior recovery, suggesting an underlying biomechanical factor that home care alone will not fix.
- You are simply unsure whether what you are feeling is sesamoiditis, turf toe, or something else, since the treatment paths diverge.
If you live with diabetes, peripheral neuropathy, or vascular disease, your threshold for seeking care should be considerably lower. Reduced sensation can mask worsening symptoms, and impaired circulation slows healing in ways that make early professional input far more valuable than it would be for someone without those conditions. A complete guide to when to see a podiatrist walks through additional scenarios worth flagging early rather than waiting out.
How Do You Prevent Sesamoiditis From Coming Back?
Long-term prevention comes down to consistent footwear discipline and a maintenance exercise routine you keep doing well after the pain is gone, not just while you are actively rehabbing.
Run through this footwear checklist before buying your next pair of daily or athletic shoes:
- Stiff forefoot: The shoe should resist bending at the ball of the foot when you try to fold it in half.
- Rocker sole: A slight curve helps you roll through your stride instead of hyperextending the big toe joint.
- Adequate cushioning under the forefoot: Avoid minimalist shoes with thin, unforgiving soles.
- Roomy, rounded toe box: Skip pointed styles that compress the forefoot and concentrate pressure on the sesamoids.
Beyond shoe choice, keep up the intrinsic foot-strengthening exercises from your rehab phase, even after symptoms fully resolve. Calf flexibility matters too, since a tight calf changes how your forefoot loads during push-off. If you are returning to running or another high-impact sport, build mileage or intensity gradually rather than jumping back to your pre-injury training volume in one leap. Revisit your orthotics every year or two, or sooner if your activity level changes significantly, and check in with a podiatrist if symptoms start creeping back at all. Simple daily habits from a foot mobility routine can reinforce these gains between formal follow-ups.
How Does Stride Foot & Ankle Approach Sesamoiditis Care?
At Stride Foot & Ankle, sesamoiditis care follows the same conservative-first sequence outlined throughout this guide: offloading and footwear correction first, custom orthotics when needed, and in-office modalities like ultrasound-guided injections or shockwave therapy reserved for cases that do not respond to the basics. Surgery is considered only when these steps fail to resolve symptoms over a reasonable trial period, consistent with AAOS guidance that treats sesamoidectomy as a last resort given the biomechanical downsides of removing a sesamoid bone entirely.
If you come in for an evaluation, bring the shoes you wear most often for work and exercise, a rough timeline of when your symptoms started and what makes them better or worse, and any prior X-rays or MRI reports if you have already had imaging done elsewhere. A typical visit includes a hands-on exam, a weight-bearing X-ray if one has not already been done, and a discussion of where you land on the conservative-treatment pathway. Physical therapy referrals happen when a structured, supervised rehab program will get you back to activity faster than a self-directed one.
What Recovery Timeline Should You Realistically Expect?
Mild sesamoiditis cases typically resolve in 6 to 8 weeks with consistent offloading and rehab. Moderate cases, especially those involving a bipartite sesamoid irritation or slower-responding inflammation, often run 12 to 16 weeks. Athletes should plan for the longer end of that range or beyond, since pooled data from conservative treatment studies found only about 45% of athletes in one series returned to fully pain-free sport, underscoring how variable outcomes can be for this population specifically.
Recurrence risk climbs when someone returns to full loading too early, when an underlying biomechanical contributor like a plantarflexed first ray goes uncorrected, or when diagnosis and treatment were delayed in the first place. In-office interventions like orthotics and, when appropriate, corticosteroid injections can meaningfully shift this trajectory for people who have plateaued on home care alone. Surgery remains a limited, later-stage option reserved for cases that exhaust conservative measures, since removing a sesamoid bone changes forefoot mechanics permanently.
What the Evidence Actually Supports and Where Conventional Advice Falls Short
The research on sesamoiditis treatment tells a more nuanced story than most quick-reference guides let on. That is a meaningfully lower success rate than the confident “six weeks and you’re back” framing you will find on a lot of generic health sites.
Where conventional advice most often falls short is progression criteria. Too many recovery plans hand patients a calendar instead of a benchmark. Healing tissue does not check a calendar; it responds to load. The walk-30-minutes-pain-free rule matters more than any specific week number, because it measures what the joint can actually tolerate rather than how much time has passed.
If there is one priority worth taking from this evidence, it is sequencing discipline. Offload first, adjust footwear next, add orthotics before considering injections, and treat corticosteroid shots as a bridge, not a fix. Skipping steps to chase a faster recovery tends to backfire.
— Ramil
Get Evaluated for Sesamoiditis in Las Vegas
If home care and a few weeks of offloading have not settled your sesamoid pain, an in-person evaluation catches what a mirror and internet research cannot: whether you are dealing with straightforward inflammation, a bipartite sesamoid, or an early fracture that needs a different plan entirely. Stride Foot & Ankle offers a full conservative-first pathway under one roof in Las Vegas, from weight-bearing X-rays and custom orthotic fittings to ultrasound-guided injections and shockwave therapy, so you are not bounced between multiple offices while your pain drags on.
Booking is straightforward: request an appointment online and bring the shoes you wear most, a short timeline of your symptoms, and any prior imaging you already have. Most insurance plans cover podiatric evaluation and conservative treatment, and the front desk team can help verify your specific benefits before your visit. If conservative measures do not fully resolve your symptoms, Dr. Nahad Wassel will walk you through next steps, including whether a referral for further imaging or, in rare cases, surgical consultation makes sense for your situation. Visit the general foot and ankle care page to see the full range of services and request your evaluation today.
Key Takeaways
Sesamoiditis responds best to a strict sequence: offload the joint immediately, correct footwear and add orthotics before considering injections, and use a pain-free walking benchmark, not a calendar date, to decide when running resumes.
| Point | Details |
|---|---|
| Offload immediately | Use a J-pad and stiff-soled shoe from day one to reduce pressure on the sesamoid bones. |
| Watch for fracture red flags | An acute pop with bruising or inability to bear weight needs urgent imaging, not home care. |
| Follow the exercise sequence | Progress from towel scrunches to resisted plantarflexion only once each stage is pain-free. |
| Use the 30-minute rule | Walk pain-free for 30 minutes on hard ground before attempting a return to running. |
| See Stride Foot & Ankle if stuck | The clinic offers weight-bearing X-rays, orthotics, and ultrasound-guided injections when home care plateaus. |
This article is general information, not a substitute for advice from a qualified doctor. Consult a qualified healthcare professional about your own circumstances before acting on anything here.
Sources
- Conservative Treatment of Sesamoiditis: A Systematic Literature Review with Individual-Level Pooled Data Analysis
- Sesamoiditis: What It Is, Symptoms & Treatment
FAQ
What is the fastest way to treat sesamoiditis?
Immediate, consistent offloading with a J-pad and stiff-soled shoe, combined with icing and NSAIDs if appropriate, brings the fastest early relief, with most people noticing improvement within about two weeks.
Can I walk with sesamoiditis?
Yes, but you should walk in a stiff-soled shoe with an offloading pad in place, and avoid barefoot walking on hard surfaces until pain has meaningfully settled.
How long does a broken sesamoid take to heal?
A confirmed sesamoid fracture generally takes longer than simple inflammation, often requiring several weeks of protected weight-bearing in a boot, and your podiatrist will confirm healing progress with follow-up imaging.
What triggers sesamoiditis?
Repetitive forefoot loading from running, dancing, or repeated toe-off movements is the most common trigger, along with training errors, high heels, and foot structures like a high arch or plantarflexed first ray.
How long is sesamoiditis recovery time overall?
Mild cases typically resolve in 6 to 8 weeks, moderate cases in 12 to 16 weeks, and athletes often need longer given lower rates of full pain-free return to sport reported in pooled outcome data.
Recommended
- Arthritis Can Be Painless in your Feet – Stride Foot & Ankle – Dr. Nahad Wassel
- Treating Warts on the Feet – Stride Foot & Ankle – Dr. Nahad Wassel
- Why Treat Foot Arthritis: Pain Relief and Mobility Guide – Stride Foot & Ankle – Dr. Nahad Wassel
- Step-by-step foot care routines for pain relief – Stride Foot & Ankle – Dr. Nahad Wassel
Recent Comments