

TL;DR:
- Proper ankle rehabilitation follows the PEACE & LOVE protocol, progressing from early swelling control to strength, proprioception, and sport-specific exercises. Recovery timelines vary by injury severity and surgical intervention, emphasizing criteria-based progression over fixed schedules. Consistent, phased rehab coupled with professional guidance reduces re-injury risk and restores full ankle function.
Step by step ankle rehab is a structured, phased process that combines mobility, strength, proprioception, and balance training to restore full ankle function after injury or surgery. The modern standard is the PEACE & LOVE protocol, which replaces the outdated RICE method and guides recovery from the first hours through return to sport. Injury severity shapes the timeline: Grade 1 sprains resolve in 1–3 weeks, Grade 2 in 3–6 weeks, and Grade 3 in 6–12 or more weeks. Skipping phases or stopping too early is the single most common reason patients develop chronic ankle instability. This ankle rehabilitation guide gives you every phase, every exercise, and every milestone you need to recover with confidence.
What are the phases of step by step ankle rehab?
Ankle rehabilitation follows two distinct phases built into the PEACE & LOVE protocol. Each phase has a specific goal, and moving through them in order is what separates full recovery from a recurring problem.
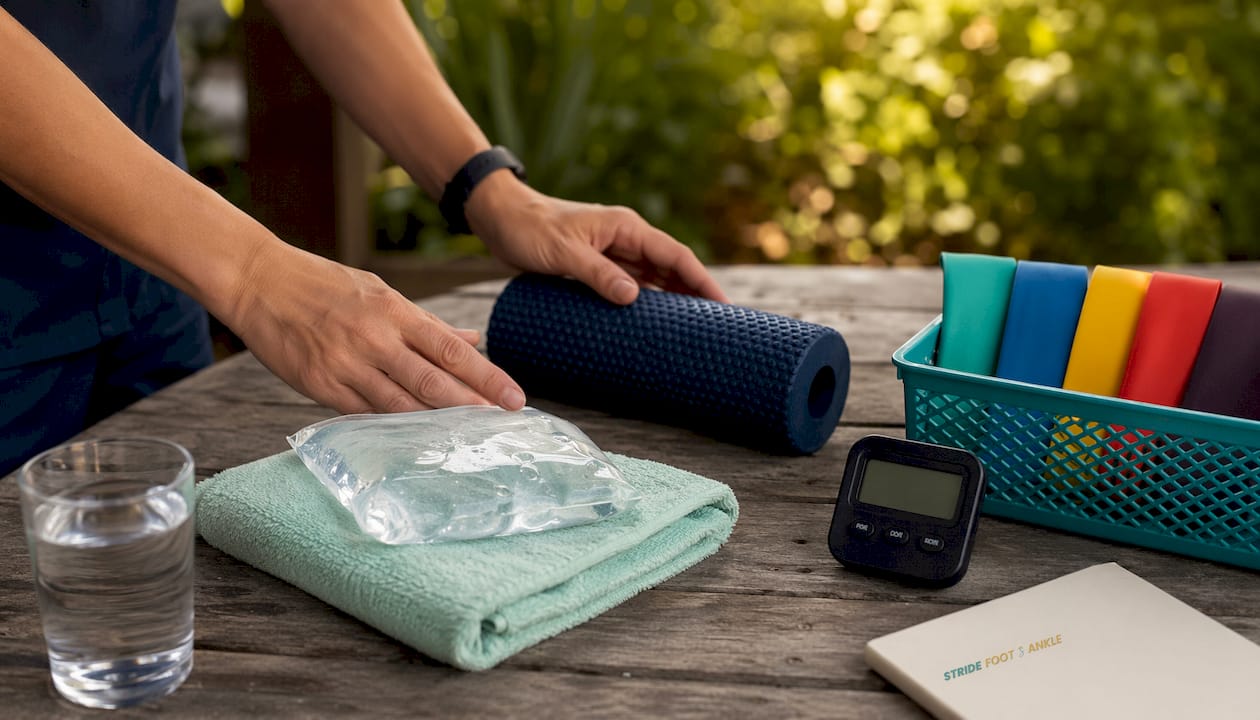
Phase 1: PEACE (days 1–3)
The PEACE phase covers the first 72 hours after injury. The goal is to control pain and swelling without interfering with the body’s natural healing response.
- Protect the ankle by limiting weight-bearing activity. Use crutches if walking causes sharp pain.
- Elevate the foot above heart level for at least 20 minutes, three times per day. This reduces fluid buildup in the joint.
- Avoid anti-inflammatories. NSAIDs like ibuprofen blunt the inflammatory signals your body uses to begin tissue repair. Use them only if pain is severe and under medical guidance.
- Compress the ankle with an elastic bandage or compression sleeve. Start at the toes and wrap upward to prevent pooling of fluid.
- Educate yourself on the injury. Understanding that swelling and bruising are normal reduces fear and sets realistic expectations.
Pro Tip: Elevating your foot on two pillows while sleeping during the first three nights reduces morning stiffness significantly and makes the next day’s movement much easier.
Phase 2: LOVE (day 3 onward)
The LOVE phase begins once acute swelling starts to settle. This is where active recovery takes over.
- Load the ankle progressively. Early weight-bearing, even partial, stimulates ligament healing and prevents muscle atrophy.
- Optimism matters clinically. Patients who expect a good outcome recover faster. Fear of movement delays progress.
- Vascularization through low-impact cardio, such as pool walking or stationary cycling, maintains blood flow to healing tissue without stressing the ligament.
- Exercise in a structured sequence: mobility first, then strength, then proprioception, then sport-specific drills.
Prolonged immobilization beyond the PEACE phase causes joint stiffness, calf weakness, and loss of proprioception. That combination dramatically increases the risk of re-injury. The ankle sprain recovery process at Stridefootankle outlines how each phase connects to the next.
What specific exercises make up each rehab phase?
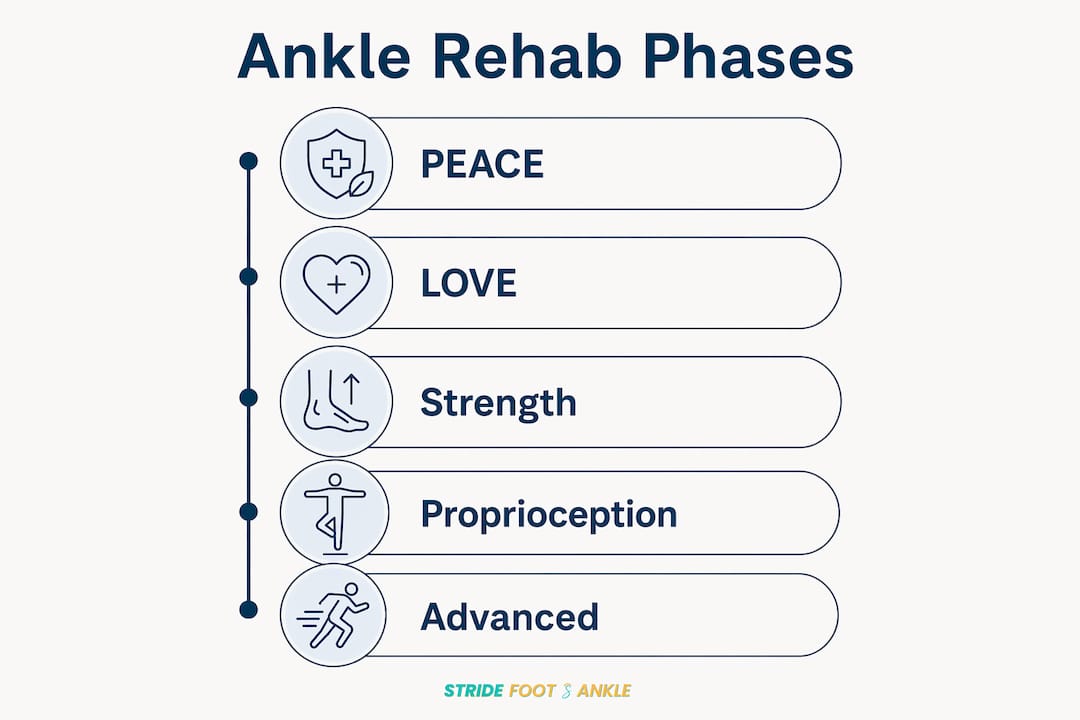
The right exercises at the right time drive recovery. Doing strength work too early strains healing tissue. Staying in the mobility phase too long delays the strength gains that protect the joint.
Early mobility exercises (days 3–10)
These exercises restore range of motion without loading the ligament under stress.
- Ankle alphabet: Trace each letter of the alphabet with your big toe while seated. This moves the joint through its full range in a pain-free, controlled way.
- Towel calf pump: Sit with your leg extended and loop a towel around the ball of your foot. Gently pull the towel toward you to stretch the calf, then point your foot away. Repeat 15 times.
- Ankle circles: Rotate the foot clockwise 10 times, then counterclockwise 10 times. Stop if you feel sharp pain rather than mild discomfort.
Strength exercises (weeks 2–6)
Strength training begins once you can bear full weight without a significant limp.
- Isometric holds: Press your foot against a wall in four directions (up, down, in, out) and hold each for 10 seconds. This builds strength without moving the joint through a painful range.
- Theraband resistance: Loop a resistance band around the foot and perform dorsiflexion (pulling foot up), plantar flexion (pointing foot down), inversion, and eversion. Three sets of 15 repetitions each.
- Calf raises: Start with both feet on a flat surface. Progress to a single-leg calf raise on a step once you can complete 20 pain-free bilateral repetitions.
Dorsiflexion restoration is the most critical mobility goal in this phase. Without it, your midfoot and knee compensate during walking, creating secondary pain that outlasts the original ankle injury.
Proprioception exercises (weeks 3–8)
Balance exercises on unstable surfaces retrain the mechanoreceptors damaged during injury. These sensors tell your brain where your ankle is in space. Without retraining them, re-sprain risk stays elevated even after pain disappears.
- Single-leg stance: Stand on the injured foot for 30 seconds with eyes open. Progress to eyes closed once you can hold steady.
- Balance board: Stand on a wobble board or BOSU ball for 60 seconds. Add small knee bends to increase difficulty.
- Tandem stance: Stand heel-to-toe on a firm surface, then progress to an unstable surface.
Pro Tip: Practice single-leg balance while brushing your teeth. Two minutes twice a day adds up to 28 minutes of proprioception training per week without any extra time commitment.
Advanced and sport-specific exercises (weeks 6 onward)
| Exercise | Goal | Progression signal |
|---|---|---|
| Step-ups | Single-leg strength and control | Pain-free single-leg calf raise |
| Forward lunges | Dynamic stability | Symmetric strength on both legs |
| Jump rope (two feet) | Impact tolerance | Full weight-bearing without pain |
| Single-leg hops | Power and landing mechanics | Hop test limb symmetry index above 90% |
| Lateral shuffle drills | Sport-specific cutting | Cleared by clinician or therapist |
Kinesiology taping using a Y-strip and stirrup technique supports the lateral ligaments and enhances proprioceptive feedback during this phase. The tape can be worn for 3–5 days, including in the shower, making it practical for daily training.
How do rehab timelines vary with injury severity and surgery?
Recovery duration depends on the grade of injury and whether surgery was involved. Timelines below reflect active, consistent rehab. Passive rest alone extends every figure significantly.
| Injury type | Expected timeline | Key milestone |
|---|---|---|
| Grade 1 sprain | 1–3 weeks | Full weight-bearing without pain |
| Grade 2 sprain | 3–6 weeks | Symmetric strength and balance |
| Grade 3 sprain | 6–12+ weeks | Hop test symmetry above 90% |
| Broström ligament repair | 12–16 weeks | Criteria-based clearance |
| ORIF (fracture fixation) | 16–24 weeks | Full ROM and strength symmetry |
| Tendon repair | 20–26 weeks | Return to running without pain |
Post-operative rehab requires strict phase-by-phase progression to protect the repaired tissue. Ligament reconstruction recovery is criteria-based, not calendar-based. That means you advance when you meet objective benchmarks, not simply when a set number of weeks has passed.
The three key criteria for return to sport are symmetric range of motion within 5 degrees, a hop test limb symmetry index above 90%, and psychological readiness. Psychological readiness matters more than most patients expect. Fear of re-injury causes protective movement patterns that actually increase injury risk. Addressing that fear directly is part of the rehab process.
Patients recovering from surgery should also review what ankle surgery recovery involves before starting a home program. Surgical cases always require professional supervision for the early phases.
Returning too early is the most damaging mistake in ankle rehab. Chronic lateral ankle instability develops primarily when proprioceptive retraining is cut short. Research shows that advanced balance training should continue for at least 6 weeks to fully restore joint position sense after a significant sprain.
What are the key tips and common mistakes to avoid?
Most setbacks in ankle rehab come from two errors: stopping too soon and doing too much too fast. Both are avoidable with a clear plan.
Mistakes to avoid:
- Stopping rehab when the limp disappears. Most patients quit around three weeks, right when strengthening should be intensifying. Pain-free walking is not the finish line.
- Skipping dorsiflexion work. Tight calves and limited upward ankle movement cause the knee and midfoot to compensate, leading to pain that shows up weeks later in unexpected places.
- Avoiding all cardio during recovery. Pool running and cycling maintain cardiovascular fitness and promote blood flow to healing tissue without stressing the ligament.
- Returning to sport in worn-out footwear. Shoes with collapsed heel counters provide no lateral support and undo weeks of proprioception training in a single session.
- Ignoring warning signs. Increasing swelling, sharp pain with weight-bearing, or numbness in the foot after exercise all signal that something needs professional evaluation.
Tips that actually work:
- Use ankle bracing guidance during the return-to-sport phase. A lace-up or semi-rigid brace reduces re-sprain risk without weakening the ankle when combined with active rehab.
- Track your progress with a simple weekly log: pain score, single-leg balance time, and calf raise count. Objective numbers keep you honest about where you are.
- Integrate rehab into daily routines. Calf raises at the kitchen counter, ankle circles during TV time, and single-leg balance while waiting for coffee all add meaningful volume.
“The patients who recover fully are almost never the ones who did the most. They are the ones who did the right things consistently, even on the days when progress felt invisible. Optimism about your recovery is not wishful thinking. It is a clinical variable that shapes your outcome.”
A stepwise sports injury recovery approach applies the same phased logic to all soft tissue injuries, which is useful context if you are managing ankle rehab alongside other injuries from the same incident.
Key Takeaways
Structured, phased ankle rehab using the PEACE & LOVE protocol, progressing from mobility through strength, proprioception, and sport-specific training, is the most effective approach to full recovery and re-injury prevention.
| Point | Details |
|---|---|
| Follow PEACE & LOVE | Use PEACE for the first 3 days, then shift to active loading and exercise from day 3 onward. |
| Progress by criteria, not calendar | Advance each phase when you meet objective benchmarks like hop test symmetry, not just elapsed time. |
| Prioritize proprioception | Balance training on unstable surfaces must continue for at least 6 weeks to prevent chronic instability. |
| Restore dorsiflexion early | Limited upward ankle movement causes compensatory knee and midfoot pain if left unaddressed. |
| Do not stop at pain-free walking | Strengthening and proprioception work must continue well past the point when limping resolves. |
Why I think most ankle rehab advice stops too short
I have seen the same pattern repeat itself across hundreds of patients. Someone rolls their ankle, follows the early steps well, stops limping after two or three weeks, and declares themselves recovered. Six months later, they are back with a second sprain on the same ankle, often worse than the first.
The problem is not motivation. It is expectation. Most people believe that no pain means no problem. In ankle rehab, that belief is genuinely dangerous. The ligament may be pain-free long before the mechanoreceptors inside it have recovered their sensitivity. Those sensors are what keep you from rolling your ankle on an uneven sidewalk. You cannot feel them working, which is exactly why so many patients skip the proprioception phase entirely.
The LOVE protocol’s inclusion of “optimism” as a clinical component surprised me when I first encountered it. It sounded soft. But the evidence behind it is real. Patients who approach recovery with confidence, who believe they will return to full function, consistently outperform those who are fearful or passive. That mindset shapes how aggressively they load the ankle, how consistently they train, and how willing they are to push through mild discomfort in the strength phase.
My practical advice: build your rehab into a non-negotiable daily slot, the same way you would a medication. Ten to fifteen minutes every morning beats forty-five minutes three times a week when it comes to proprioception retraining. Consistency wins. If your progress stalls at any phase, that is the signal to get a professional assessment rather than push harder on your own. A clinician can identify whether the limitation is mechanical, neurological, or psychological, and adjust the program accordingly.
— Ramil
Personalized ankle care at Stridefootankle
Recovering from an ankle injury is straightforward when you have the right plan and the right support behind it.
Stridefootankle, led by Dr. Nahad Wassel in Las Vegas, provides specialized foot and ankle care that goes beyond generic advice. Dr. Wassel evaluates gait mechanics, joint function, and injury severity to build a rehab plan matched to your specific situation. The practice also offers ultrasound wound healing therapy, bracing guidance, and post-surgical rehab support. Whether you are managing a Grade 2 sprain at home or recovering from a Broström repair, a personalized assessment gives you a clear path forward and reduces the risk of chronic instability. Schedule a consultation and get back on your feet with a plan built for you.
FAQ
What is the PEACE & LOVE protocol for ankle rehab?
PEACE & LOVE is the modern evidence-based standard replacing RICE for ankle sprain management. PEACE covers the first 3 days (protect, elevate, avoid anti-inflammatories, compress, educate), and LOVE guides recovery from day 3 onward through loading, optimism, vascularization, and exercise.
How long does ankle rehab take after a sprain?
Grade 1 sprains typically resolve in 1–3 weeks with active rehab, Grade 2 in 3–6 weeks, and Grade 3 in 6–12 or more weeks. Post-surgical cases such as a Broström repair require 12–16 weeks of structured, criteria-based recovery.
When is it safe to return to sport after an ankle injury?
Return to sport is criteria-based, not calendar-based. Safe return requires symmetric range of motion within 5 degrees, a hop test limb symmetry index above 90%, and confirmed psychological readiness to load the ankle under sport conditions.
What is the most important exercise in ankle rehab?
Single-leg balance training on progressively unstable surfaces is the most important exercise for preventing re-injury. It retrains the mechanoreceptors damaged during the sprain and restores the joint position sense needed to protect the ankle during daily movement and sport.
Can I do ankle rehab at home without a physical therapist?
Mild to moderate sprains (Grade 1 and Grade 2) can be managed at home using a structured progressive program. Grade 3 sprains, post-surgical cases, or any situation where pain or swelling increases with exercise requires professional evaluation before continuing.
Recommended
- Ankle Sprain: Causes, Treatment, and Recovery Guide – Stride Foot & Ankle – Dr. Nahad Wassel
- Post-Surgery Foot Care Steps for Safe Recovery – Stride Foot & Ankle – Dr. Nahad Wassel
- Bracing for Foot and Ankle Injuries: 2026 Guide – Stride Foot & Ankle – Dr. Nahad Wassel
- Ankle Sprain Recovery Process: Your 2026 Rehab Guide – Stride Foot & Ankle – Dr. Nahad Wassel
Recent Comments