

The most effective non-surgical fix for ankle instability is a phased program combining neuromuscular control, balance training, and ankle-specific strength work, progressed from static positions to dynamic, reactive movement. A typical sequence runs three phases: Protect (weeks 0 to 2), Rebuild (weeks 2 to 8), and Return-to-Sport (week 8 onward).
- Protect: control swelling, restore range of motion
- Rebuild: ankle and hip strength, static-to-dynamic balance
- Return-to-Sport: reactive balance, hopping, cutting drills
Stop and get evaluated if you have severe swelling, uncontrolled pain, or you cannot bear weight on the ankle at all. Up to 70% of people who sprain an ankle go on to develop chronic instability without proper rehab, so this isn’t a program to wing.
Key Takeaways
Ankle instability improves most reliably through a phased program of neuromuscular balance training and ankle-specific strength, progressed from static holds to reactive, dynamic movement over eight or more weeks.
| Point | Details |
|---|---|
| Follow the three phases in order | Protect (0 to 2 weeks), rebuild (2 to 8 weeks), then return-to-sport (8+ weeks); skipping ahead raises re-injury risk. |
| Train hips, not just ankles | Single-leg deadlifts and side planks reduce the load on ankle strategies and often unlock stalled progress. |
| Progress on objective markers | Advance only after a 30-second single-leg hold, improvement in balance test performance, and pain under 2 out of 10. |
| Know your red flags | Persistent giving-way after 8 to 12 weeks, recurrent swelling, or locking means it’s time to see Stridefootankle. |
This article is general information, not a substitute for advice from a qualified doctor. Consult a qualified healthcare professional about your own circumstances before acting on anything here.
Table of Contents
- What Does a Phased Ankle Rehab Program Look Like?
- Which Exercises Actually Improve Ankle Stability?
- How Do You Know When to Progress an Exercise?
- What Does the Research Say About Exercise for Ankle Instability?
- How Stridefootankle Supports Your Ankle Rehab Plan
- Sources
- FAQ
What Does a Phased Ankle Rehab Program Look Like?
A phased program moves in three stages, each with its own goal, timeline, and way of knowing you’re ready to move forward. Skipping phases is the single most common reason people cycle through repeat sprains for years.
- Protected phase (0 to 2 weeks). Goal: control pain and swelling, restore range of motion. Gentle ankle pumps, alphabet tracing, and pain-free weight bearing as tolerated. No aggressive stretching into pain.
- Rebuild/control phase (2 to 8 weeks). Goal: rebuild strength in the ankle and hip, and introduce static balance work. This is where four-way resistance band work, calf raises, and single-leg stance drills earn their place. Early functional rehab should layer in progressive isometric and isotonic strengthening rather than waiting for pain to disappear entirely.
- Advanced/return-to-sport phase (8+ weeks). Goal: reactive control under speed and unpredictability. Wobble board perturbations, hopping, and cutting drills belong here, not earlier.
Aim for three sessions a week, 30 to 60 minutes each. That dosage isn’t arbitrary. A meta-analysis in Scientific Reports found programs run at this frequency for more than eight weeks produced the largest, most durable gains in balance and self-reported function. Success looks like fewer episodes of the ankle “giving way” and steadier scores on function measures like the FAAM.
Pro Tip: Track your single-leg hold time weekly with your phone’s stopwatch. A flat or declining number, despite consistent practice, usually means you’re progressing the wrong variable (adding instability before you have strength).
For a deeper walkthrough of week-by-week milestones, Stridefootankle’s step-by-step ankle rehab guide breaks the recovery timeline down further.
Which Exercises Actually Improve Ankle Stability?
A complete exercise library covers six categories: range of motion, ankle-specific strength, foot intrinsics, hip and core stability, proprioception, and (later) plyometrics. Here’s how to build each one.
Range of motion. Seated ankle circles and alphabet tracing, 2 to 3 sets of 10 letters, done daily in the protected phase. Common error: forcing dorsiflexion into pain. Progress by adding a towel stretch once pain-free motion returns.
Ankle four-way resistance. Loop a resistance band around the forefoot and work dorsiflexion, plantarflexion, inversion, and eversion, 2 to 3 sets of 12 to 15 reps each direction. Progress with heavier bands before adding speed.
Calf raises. Start double-leg, 3 sets of 15. Move to single-leg once you can do 20 double-leg reps without compensating. Add a slow 3 to 4 second eccentric lowering phase to build tendon resilience, a detail most home programs skip entirely.

Foot intrinsic work. Towel scrunches and short-foot doming, 2 sets of 10, strengthen the small stabilizers that ankle-only programs ignore. Targeted strengthening that includes proximal and intrinsic work outperforms ankle-only strengthening for dynamic stability.
Hip and core stabilizers. Single-leg Romanian deadlifts and side planks, 2 to 3 sets of 8 to 10 reps, reduce how hard the ankle has to work to keep you upright. This category gets skipped constantly, and it shouldn’t.
Proprioception and balance. Progress in this order: single-leg stance on firm ground (eyes open, then closed) → foam pad → wobble board → unpredictable manual perturbations from a partner or clinician. Retraining reactive peroneal timing through unpredictable perturbations matters because that’s where real-world sprains happen, not on flat, predictable ground.
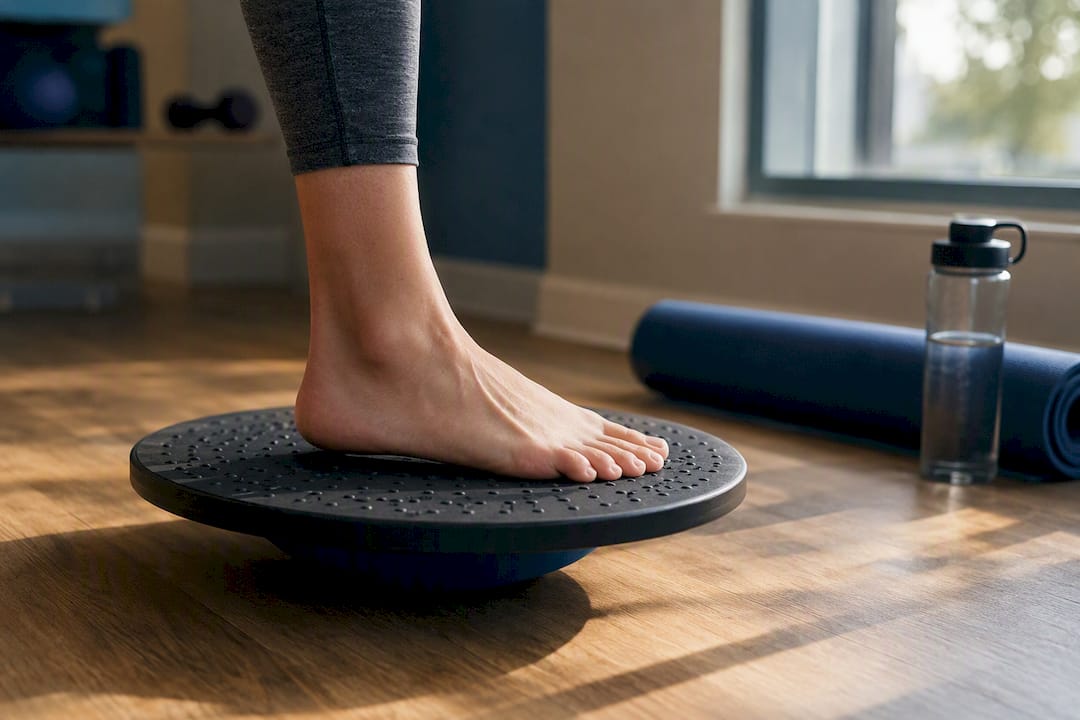
Plyometric and agility progressions (Return-to-Sport phase only): multi-directional hopping, lateral shuffles, and change-of-direction drills, 2 to 3 sets of 30 to 45 seconds each.
Pro Tip: When you add a wobble board, keep your eyes on a fixed point across the room instead of looking down at your feet. Watching your ankle move actually slows down the automatic, reflexive correction you’re trying to build.
How Do You Know When to Progress an Exercise?
Hitting all three, not just one, is what separates real progress from wishful thinking.
Advance variables in this order: load first, then surface instability, then speed, then cognitive challenge (like catching a ball while balancing). Jumping straight to an unstable surface before you have baseline strength is a fast way to reinjure the joint.
Self-check weekly for swelling, pain trends, and function. Get reassessed if you notice increasing instability, recurrent swelling after activity, or any inability to bear full weight. Single-limb balance test performance actually predicts who responds well to continued balance training, so retesting isn’t busywork. It tells you whether to keep going or change course.
Equipment, Home Modifications, and Low-Cost Alternatives
You don’t need a clinic gym to run this program. A resistance band ($10 to $15) substitutes for cable machines; a folded towel works as a beginner balance surface before you invest in a foam pad. A wobble board is worth the purchase once you’re solidly in the rebuild phase and need graded instability.
- No band? Use a bath towel looped around the forefoot for resistance.
- No wobble board? Progress from a folded towel to a couch cushion first.
- Weight-bearing restricted? Stick to seated ROM and isometric holds until cleared.
Safety note: only move onto unstable surfaces once you have pain-free strength and full weight-bearing tolerance. Unstable-surface work on a joint that’s still guarding is how minor setbacks turn into major ones.
What Does the Research Say About Exercise for Ankle Instability?
Exercise therapy meaningfully reduces re-injury risk after a lateral ankle sprain, and combined strength-plus-balance programs consistently beat single-modality training. Up to 70% of people who sprain an ankle develop chronic instability without adequate rehab, which is the statistic that should motivate every step of this program.
Clinical practice guidelines recommend proprioceptive and neuromuscular exercise as the backbone of treatment, with manual therapy as a supplement rather than a substitute. A network meta-analysis in JOSPT found combined balance-and-strength programs outperform single-modality training on both SEBT and FAAM outcomes.
Three takeaways for your program:
- Use neuromuscular and balance training as the core, not an afterthought.
- Include proximal (hip and core) strengthening, not just ankle isolation.
- Reserve surgery for cases where structured conservative care has genuinely failed.
When Is It Time to See a Clinician?
See a foot and ankle specialist if you still have giving-way episodes after 8 to 12 weeks of consistent, guided rehab, recurrent swelling, mechanical locking, or any numbness or tingling. A clinician can offer supervised progression, bracing or orthotics, manual therapy, or imaging to rule out structural damage.
- Persistent instability despite 8 to 12 weeks of proper rehab
- Recurrent swelling, locking, or neurological symptoms
- No improvement in single-leg balance or FAAM scores over time
Surgical stabilization is rarely the first move. It’s generally reserved for mechanical instability that persists after a genuine, adequately dosed rehab attempt.
What Clinic Experience Teaches About Ankle Rehab
Hip weakness is the most overlooked piece of the puzzle. One patient plateaued for months on ankle drills alone, then improved noticeably once single-leg deadlifts and hip abductor work were added to address a proximal strength gap the ankle had been compensating for. A solid home program still benefits from occasional clinician check-ins to catch these blind spots early.
How Stridefootankle Supports Your Ankle Rehab Plan
A home exercise program gets you most of the way there, but a gait and shoe evaluation, imaging when something isn’t healing as expected, and a properly fitted brace are things no wobble board can replace. Stridefootankle’s clinic visits build directly on the phased program outlined above rather than starting over from scratch.

At a first visit, expect a focused assessment of your ankle’s range of motion, strength, and balance performance, a review of your current exercise progression to catch gaps like the hip weakness described above, and a discussion of whether bracing, orthotics, or imaging makes sense for your case. If conservative measures aren’t cutting it, Dr. Nahad Wassel’s practice also covers surgical stabilization options as a later-line step, and conservative care approaches that aim to avoid surgery altogether.
If your ankle keeps giving way despite months of dedicated rehab, book an evaluation through Stridefootankle’s general foot and ankle care page and get a plan built around your specific deficits, not a generic handout.
Sources
- PubMed: study summary
- Scientific Reports: Effectiveness of exercise therapy on chronic ankle instability: a meta-analysis
- Chronic ankle instability clinical practice guideline (Wexner/OSU document)
- Rehabilitation of the Ankle After Acute Sprain or Chronic … (PMC review)
FAQ
What Are Two Warning Signs of Ankle Ligament Instability?
Repeated giving-way of the ankle on uneven ground and recurrent swelling after minor activity are two of the clearest signs, and both warrant a clinical evaluation if they persist beyond a few weeks.
Can Chronic Ankle Instability Be Fixed for Good?
Most people see substantial, lasting improvement with a properly dosed rehab program of balance and strength training run for eight or more weeks; a smaller group with persistent mechanical instability may need bracing or, rarely, surgery.
Why Does My Ankle Instability Feel So Bad?
Persistent instability usually comes from incomplete rehab after an earlier sprain, weak hip and proximal stabilizers, or skipping the balance and reactive-training phases that retrain how your ankle reacts to sudden movement.
Will Walking Alone Strengthen a Weak Ankle?
Walking helps maintain general mobility but doesn’t provide enough targeted resistance or balance challenge to rebuild ankle stability on its own; it needs to be paired with dedicated strength and proprioceptive drills.
Recommended
- Step by Step Ankle Rehab: Your Complete Recovery Guide – Stride Foot & Ankle – Dr. Nahad Wassel
- Ankle Sprain Recovery Process: Your 2026 Rehab Guide – Stride Foot & Ankle – Dr. Nahad Wassel
- Ankle Instability: Causes, Symptoms, and Treatment – Stride Foot & Ankle – Dr. Nahad Wassel
- Ankle Sprain: Causes, Treatment, and Recovery Guide – Stride Foot & Ankle – Dr. Nahad Wassel
Recent Comments